Token Overview
Workspace tokens provide programmatic access to your NimbleBrain workspace:CLI Authentication
Use tokens to authenticate the NimbleTools CLI (ntcli)
API Access
Call the NimbleTools API from scripts and applications
CI/CD Pipelines
Automate deployments in GitHub Actions, GitLab CI, etc.
Claude Desktop
Authenticate connections in Claude Desktop
Token Information
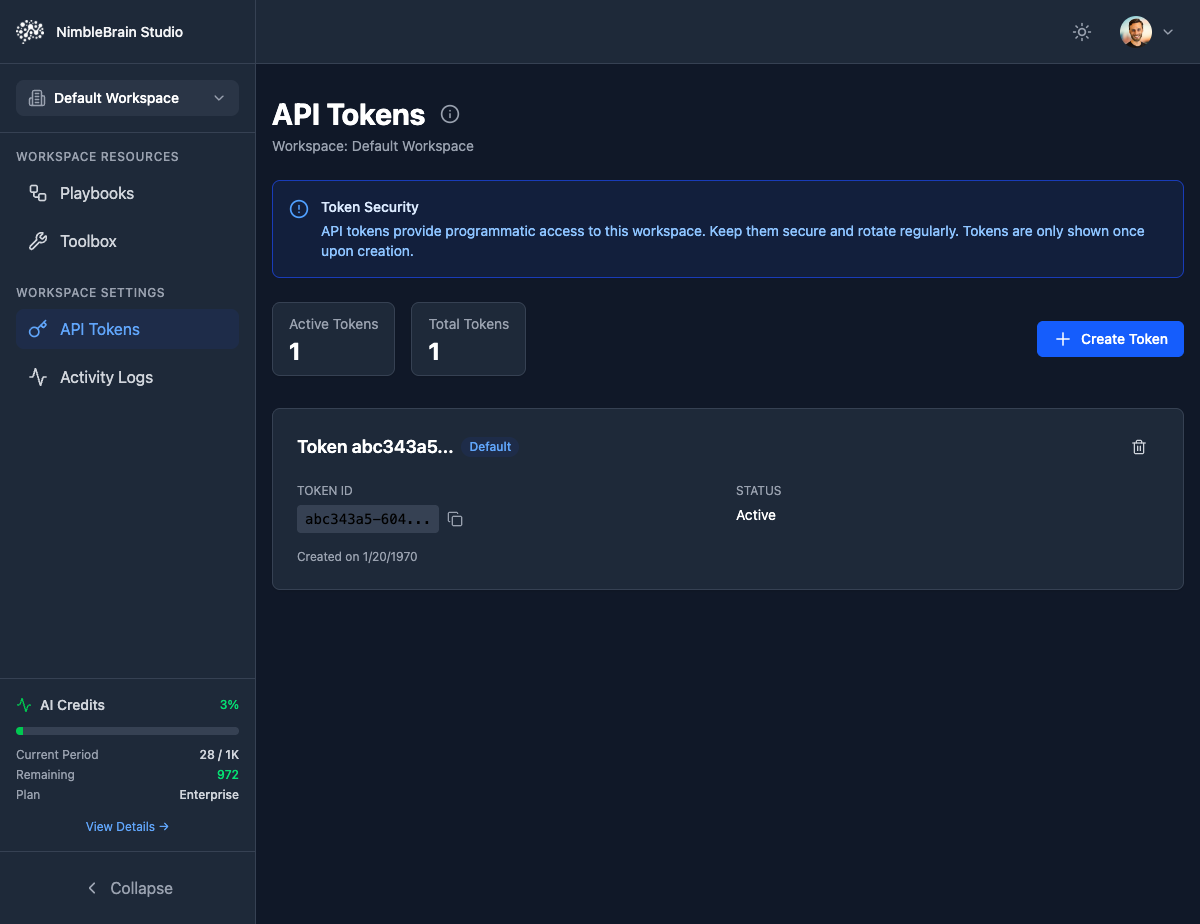
Each token includes:- Token ID: A unique identifier (e.g.,
abc343a5-604...) - Status: Active or Revoked
- Created Date: When the token was generated
- Description: Optional label to identify the token’s purpose
Security Note: API tokens provide programmatic access to this workspace. Keep them secure and rotate regularly. Tokens are only shown once upon creation.
Creating Tokens
Configure Token
Fill in token details:
- Name/Description: Optional label to identify the token’s purpose (e.g., “Claude Desktop”, “CI/CD”)
Important: Token values are only shown once! If you lose it, you’ll need to generate a new token.
Using Tokens
With NimbleTools CLI
Set your token as an environment variable:With Claude Desktop
Tokens are automatically included in generated Claude Desktop configurations:With API Requests
Include tokens in API request headers:Managing Tokens
Viewing Active Tokens
See all tokens for the current workspace:Token values are never displayed after creation. You’ll only see token metadata.
Refreshing Tokens
Extend the expiration of Standard tokens:Only Standard tokens can be refreshed. Long-Lived tokens must be regenerated when they expire.
Deleting Tokens
Immediately invalidate a token:Deleting a token immediately stops all services using it. Update integrations with a new token first!
Token Security
Best Practices
Never Commit Tokens to Git
Never Commit Tokens to Git
Add tokens to
.gitignore and use environment variables instead:Use Read-Only Tokens for Monitoring
Use Read-Only Tokens for Monitoring
Create separate read-only tokens for dashboards and monitoring tools. This limits damage if a token is compromised.
Rotate Tokens Regularly
Rotate Tokens Regularly
Rotate tokens every 90 days for production workspaces:
- Generate new token
- Update services to use new token
- Verify services work with new token
- Revoke old token
Use Different Tokens per Service
Use Different Tokens per Service
Create separate tokens for each CI/CD pipeline or service. This allows selective revocation without affecting other services.
Monitor Token Usage
Monitor Token Usage
Regularly check “Last Used” dates and revoke unused tokens to reduce attack surface.
Storing Tokens Securely
- Development
- CI/CD
- Production
Use environment variables in
.env files (don’t commit them):CI/CD Integration
GitHub Actions
GitLab CI
CircleCI
Token Expiration Handling
Automatic Refresh (CLI)
The CLI can automatically refresh Standard tokens:Manual Refresh
For services that don’t auto-refresh:Troubleshooting
Error: Invalid token
Error: Invalid token
Causes:
- Token expired
- Token was revoked
- Token is for wrong workspace
- Generate a new token in Studio
- Update your environment variables
- Verify you’re using the correct workspace
Error: Permission denied
Error: Permission denied
Causes:
- Using read-only token for write operation
- Token doesn’t have required permissions
- Generate a Standard or Long-Lived token (not Read-Only)
- Verify the token is for the correct workspace
Token not working in Claude Desktop
Token not working in Claude Desktop
Causes:
- Token not properly set in config file
- Claude Desktop not restarted
- Verify
NTCLI_TOKENis in theenvsection - Fully quit and restart Claude Desktop